Growing Southern Magnolia Seedlings: A Beginner’s Guide
I’ve always admired the Southern Magnolia, with its big, glossy leaves and those wonderfully fragrant white flowers. It feels like a classic Southern symbol. For a while now, I’ve been curious about growing these beauties from seed, and I’ve decided to share my journey. It seems like a rewarding way to bring that iconic elegance to my yard. This guide is for anyone else who’s thought, ‘I wonder if I can grow a Southern Magnolia from seed?’ I’m going to walk you through everything I’ve learned about starting southern magnolia seedlings, from getting the seeds to watching those first little leaves unfurl. It’s a process, but I think it’ll be worth it.
Key Takeaways
- Growing southern magnolia seedlings from seed is a rewarding process for bringing this classic tree to your yard.
- Southern Magnolias are native to North America and thrive in their home region, offering benefits like wildlife support and low maintenance once established.
- Proper seed preparation, including cleaning and stratification, is important for the successful germination of southern magnolia seeds.
- Providing the right soil, containers, and consistent conditions for watering and light is key to nurturing young southern magnolia seedlings.
- Patience is a virtue when growing southern magnolia seedlings, as it takes time for them to mature and bloom.
The Allure of Southern Magnolia Trees
When I think about the quintessential Southern landscape, one image immediately comes to mind: the majestic Southern Magnolia. It’s a tree that just screams “Southern charm,” with its big, glossy leaves and those incredibly fragrant, creamy-white flowers. Honestly, it’s hard to beat the visual and aromatic appeal of a mature Southern Magnolia. These trees have been around for ages, deeply rooted in the history and culture of the region. They’re not just pretty to look at; they’re also incredibly resilient, having weathered countless storms and seasons in their native habitat.
Characteristics and Appeal
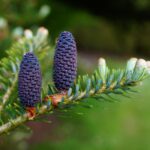
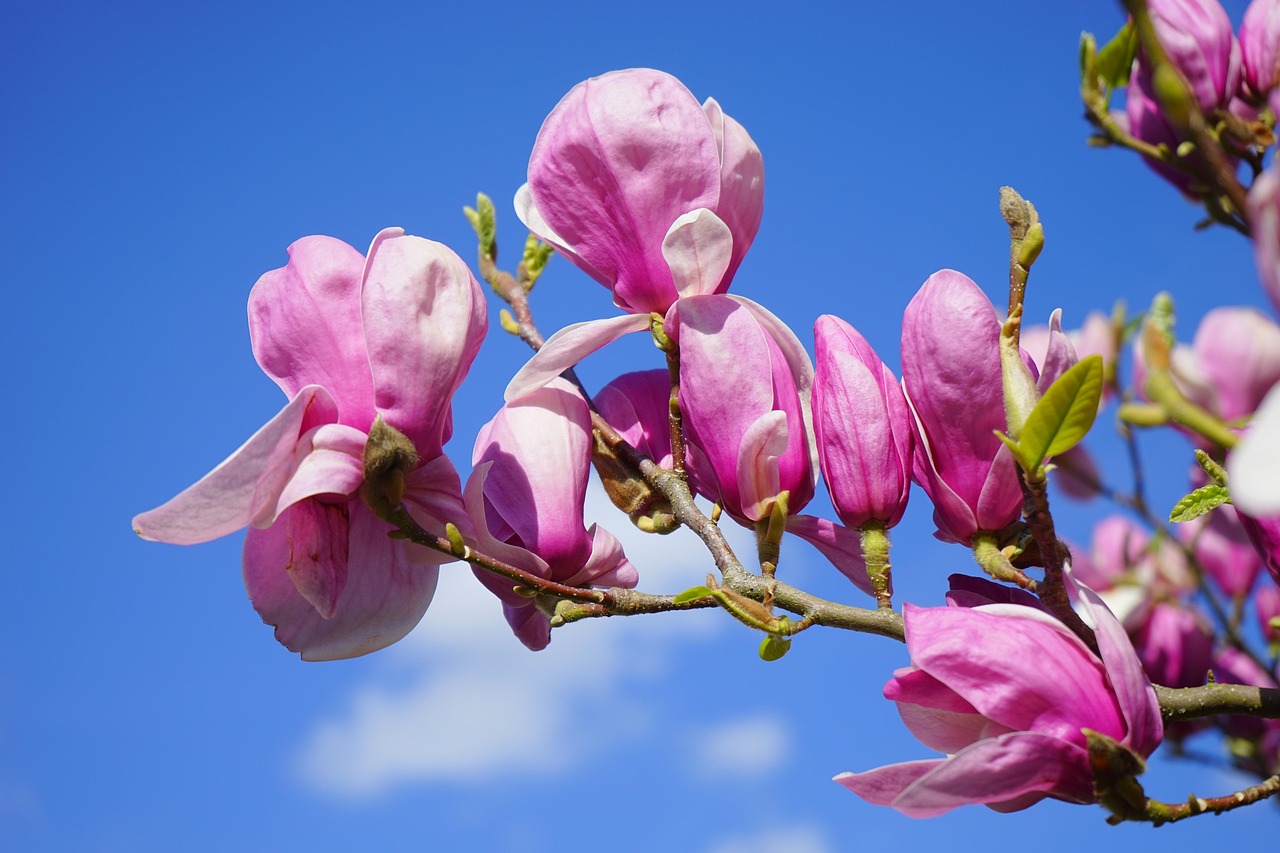
What makes the Southern Magnolia, or Magnolia grandiflora, so special? For starters, its evergreen nature means it provides beautiful greenery year-round. The leaves are thick and leathery, with a dark green, glossy top and a softer, often fuzzy underside. Then there are the flowers – oh, those flowers! Appearing in late spring and summer, they are large, cup-shaped, and a stunning ivory color, often with a delicate lemon scent. After the blooms fade, they give way to intriguing, cone-like seed pods that turn red and then eventually release seeds. It’s a whole cycle of beauty.
A Native Treasure
It’s fascinating to learn that these trees are native to the southeastern United States. This means they are perfectly adapted to the local climate and soil conditions, making them a fantastic choice for anyone living within their natural range. Planting native species like the Southern Magnolia is a great way to support local wildlife, providing food and shelter for birds and insects. Plus, they tend to be much easier to care for once established, often requiring less water and attention than non-native ornamental plants. It’s a win-win for both the gardener and the environment.
Historical Significance
These trees have a long history, even being admired and exported by early European colonists back in the 1700s. Thomas Jefferson himself requested seeds and plants to be sent to him while he was in Paris. It’s pretty amazing to think that these iconic trees have graced gardens across the Atlantic for centuries.
The enduring appeal of the Southern Magnolia lies in its combination of striking visual beauty, captivating fragrance, and its deep connection to the Southern landscape. It’s a tree that truly stands the test of time.
Cultivars and Variations
While the species itself is stunning, it’s worth noting that there are many cultivated varieties, or cultivars, of Southern Magnolia. These have been developed over time to offer different sizes, flower characteristics, or leaf variations. For instance, some cultivars are bred to be more compact, making them suitable for smaller gardens, while others might have slightly different flower colors or leaf textures. If you’re looking for a specific size or trait, exploring these cultivar options can be quite rewarding.
Why Grow from Seed?
While you can certainly buy young trees, there’s a unique satisfaction in growing a Southern Magnolia from seed. It’s a slower process, for sure, but it allows you to connect with the plant from its very beginning. It’s a journey that requires patience, but the reward of nurturing a magnificent tree from a tiny seed is truly special. This guide is all about helping you through that process.
Characteristics and Growth Habits
When I first thought about growing a southern magnolia tree seedling, I wanted to get a good handle on what makes these trees so special. They’re not just pretty; they have a whole personality of their own. The southern magnolia, or Magnolia grandiflora, is a real classic, especially in the South. It’s an evergreen, meaning it keeps its leaves all year round, which is a big part of its appeal. You’ll notice the leaves are quite substantial – thick, leathery, and a deep, glossy green on top. Flip one over, though, and you’ll see a fuzzy, almost bronze underside. It’s these leaves that give the tree its distinctive look and feel.
Size and Shape
These trees can get pretty big. I’ve seen some that are easily 60 feet tall, and occasionally, they can even reach over 100 feet. They tend to grow in a nice, classic pyramid shape, which is quite stately. It’s good to keep this mature size in mind when you’re planning where to plant your southern magnolia tree seedling, as they need plenty of space to spread out.
Flowers and Fragrance
Of course, you can’t talk about magnolias without mentioning the flowers. They are enormous, often reaching up to 12 inches across, and are a beautiful creamy white. And the smell! It’s this rich, sweet fragrance that defines a Southern summer for me. The flowers typically show up in the summer, and they are truly a sight to behold. It’s worth noting that what we call petals are technically tepals, a combination of petals and sepals, which is a neat bit of botanical trivia.
Growth Habits and Needs
Southern magnolias are pretty tough once they get going. They like rich, moist soil but don’t want to be waterlogged. They’re native to the southeastern coastal plain, so they’re used to a certain kind of environment. While they are evergreen, they do drop leaves throughout the year, with bigger drops happening in spring and fall. This leaf drop can create a thick layer of mulch underneath the tree, which is great for the soil but might mean you need to rethink planting grass right up to the trunk. A shade-loving garden bed works wonderfully there. I found some interesting details about their native habitat and how they’re often found in damp forests, which helps me understand their preferences for my southern magnolia tree seedling.
It’s important to remember that while these trees are generally hardy, providing the right start with good soil and adequate moisture is key to their long-term health and vigor. Understanding their natural tendencies helps immensely when you’re trying to grow them from seed.
Cultivars and Variations
It’s also interesting to know that there are many different types, or cultivars, of southern magnolias. People have been cultivating them for a long time, and some varieties are bred to be smaller, have different leaf colors, or even be a bit more resistant to snow. For instance, ‘Little Gem’ is a popular, smaller version that stays much more manageable in size for home gardens. It’s good to be aware of these variations when you’re selecting seeds or looking at young trees.
Harvesting Southern Magnolia Seeds
Getting seeds from a Southern Magnolia is a pretty straightforward process, but timing is key. I’ve found that the best time to collect them is in the fall, usually around September or October. You’ll know the seeds are ready when those big, showy flower buds start to turn from green to a reddish-brown and begin to open up. Inside, you’ll see the bright red seeds peeking out.
When to Harvest
- Look for the cones: The seeds are housed in a cone-like structure, which is technically called a gynoecium. These cones mature in the fall.
- Color change: The cones will start to turn from green to a reddish-brown or brown color.
- Opening cones: As the cones mature, they will naturally start to split open, revealing the seeds inside.
- Seed appearance: The seeds themselves are typically a vibrant red or orange color.
How to Harvest
When you’re ready to collect, you can simply reach out and pick the mature cones from the tree. If the cones are still a bit green or haven’t opened yet, don’t worry. You can collect them and let them finish ripening indoors. Just place them in a paper bag in a warm, dry spot. As they dry out, they should open up on their own, releasing the seeds. It’s a good idea to place a piece of newspaper or a tray underneath the bag, as the seeds can sometimes fall out as the cone opens.
It’s important to be patient with this process. Sometimes the cones take their time to mature, and forcing them open too early can result in non-viable seeds. I usually check the trees every few days once I see the first signs of ripening.
For those looking to propagate other types of magnolias, taking semi-ripe cuttings in late summer is a common method for evergreen magnolias. However, for growing from seed, fall collection is the way to go for Southern Magnolias.
Preparing Seeds for Planting
Once you’ve gathered your magnolia seeds, the next step is getting them ready for planting. This involves a couple of key processes: cleaning and stratification.
Cleaning the Seeds
It’s important to remove the fleshy red coating from the seeds. This coating can inhibit germination. I usually do this by rubbing the seeds gently between my fingers under running water. Some people prefer to soak them in water for a day or two first, which can make the coating easier to remove. After cleaning, I pat them dry with a paper towel. Making sure the seeds are clean is a small but important step for successful germination.
Stratification: Mimicking Winter
Southern Magnolia seeds need a period of cold, moist conditions to break dormancy. This process is called stratification, and it essentially tricks the seed into thinking winter has passed. Here’s how I prepare them:
- Moisten a medium: I use a mix of peat moss and sand, or even just damp paper towels. The key is that it should be moist, not soaking wet.
- Combine seeds and medium: Place the cleaned seeds into the moist medium. If using paper towels, wrap the seeds in them.
- Bag them up: Put the medium and seeds into a resealable plastic bag or a container with a loose-fitting lid. Label the bag with the date.
- Refrigerate: Store the bag in the refrigerator. I usually aim for about 60 to 90 days. It’s a good idea to check on them periodically to make sure the medium stays moist and to look for any signs of mold.
This cold treatment is really what gets the seeds ready to sprout when the conditions are right in the spring. It might seem like a lot of waiting, but it’s a necessary step for these particular seeds. You can find more information on seed preparation for various plants, like mulberry trees, which also benefit from stratification,here.
After stratification, the seeds should be ready to plant. The cold period helps to soften the seed coat and signals to the embryo that it’s time to grow. It’s a natural process that we’re just helping along.
Choosing the Right Soil and Containers for Germination
When I started growing Southern Magnolias from seed, I quickly learned that the soil and containers I used made a big difference. It’s not just about sticking a seed in any old dirt; you need to give it a good start. For germination, I’ve found that a mix that drains well but still holds some moisture is ideal. Think of it like a sponge that’s damp but not soaking wet.
Soil Mix for Germination
I usually go with a blend that’s about equal parts peat moss or coco coir and perlite or coarse sand. This combination provides good aeration, which is important to prevent the seeds from rotting, while also retaining enough moisture for them to sprout. Some people add a bit of compost, but I tend to keep it simple for the initial germination phase. The goal is to mimic the conditions that encourage the seed to wake up and start growing.
Container Selection
For containers, I prefer to use small pots or seed trays with drainage holes. Anything from recycled yogurt cups (with holes poked in the bottom) to specialized seedling pots will work. The key is that excess water can escape. If water sits around the seeds, they’re much more likely to develop fungal issues, and that’s something I try to avoid. I usually aim for containers that are at least 3-4 inches deep to give the emerging roots some room to grow.
Preparing Containers and Soil
Before I put the soil in the pots, I give them a good rinse, especially if I’m reusing them. Then, I fill them with my prepared soil mix, leaving about half an inch of space at the top. I gently moisten the soil before planting the seeds. It’s important not to pack the soil down too tightly, as this can make it hard for the delicate seedling to push through.
The right soil and container setup is like building a cozy, safe nursery for your tiny magnolia seeds. It sets the stage for successful germination and healthy early growth.
I’ve learned that using a good-quality potting mix designed for seed starting can also be a good option if you don’t want to mix your own. These mixes are usually sterile and have the right texture for germination. You can find these at most garden centers. Remember, the soil needs to be slightly acidic, with a pH between 5.5 and 6.5, which is pretty standard for most seed-starting mixes. Getting the soil right is a big step towards seeing those first little leaves emerge. You can find more information on ideal soil conditions for magnolias on pages about magnolia tree characteristics.
Planting Magnolia Seeds
Now that I’ve got my magnolia seeds cleaned and stratified, it’s time for the exciting part: planting them! It feels like a big step, but I’m going to break it down into simple actions. Getting this right is key to seeing those first little sprouts.
Gather Your Supplies
Before I start, I make sure I have everything ready. This saves me from running around later. I’ll need:
- Seed starting trays or small pots with drainage holes
- My prepared seed-starting mix (usually a blend of peat moss, perlite, and compost)
- The stratified magnolia seeds
- A spray bottle filled with water
- Labels for the pots
- A clear plastic bag or dome to cover the trays
Prepare the Planting Medium
I like to moisten my seed-starting mix before I put it into the pots. It should be damp, like a wrung-out sponge, not soggy. I fill each pot or cell, leaving about half an inch of space at the top. Gently firm the soil, but don’t pack it down too hard. I want the roots to be able to push through easily.
Planting the Seeds
This is where the actual planting happens. I usually plant one or two seeds per pot or cell, depending on their size and how many I have. I make a small indentation in the soil, about a quarter-inch deep, and place a seed in it. Then, I lightly cover the seed with the soil mix. It’s important not to plant them too deeply, as this can hinder germination.
Watering and Covering
After planting, I give the surface a gentle misting with my spray bottle. I want to make sure the soil is moist but not waterlogged. Then, I cover the trays or pots with a clear plastic bag or a humidity dome. This helps maintain a consistent moisture level and warmth, which magnolias love. I’ll be keeping an eye on the moisture levels, making sure the soil stays damp.
Labeling and Placement
Don’t forget to label each pot with the type of magnolia and the date planted! This is super helpful for keeping track of everything. I’ll place the trays in a warm spot, but out of direct sunlight for now. I’m looking forward to seeing signs of germination soon.
Creating Optimal Conditions for Germination
Once you have your magnolia seeds prepared and ready to go, creating the right environment for germination is the next big step. It’s not overly complicated, but paying attention to a few key details can make a difference in getting those seeds to sprout.
Temperature Matters
Magnolia seeds generally prefer consistent warmth to kickstart their growth. Think of it like a cozy incubator. The ideal temperature range for most Southern Magnolia seeds is between 70-80°F (21-27°C). If your home is cooler than this, especially during the winter months, you might need to use a seedling heat mat. These are pretty straightforward to use; you just place your seed trays or pots on top of them. It provides that gentle, steady warmth that mimics spring conditions.
Light Requirements
While seeds don’t need intense light to sprout, they do benefit from some. Once you see the first signs of germination – that little green shoot pushing through the soil – they’ll need light. A bright, indirect light source is best at this stage. A sunny windowsill that doesn’t get direct, scorching afternoon sun is usually perfect. If you don’t have a suitable window, grow lights can be a great option. Just keep them a few inches above the seedlings to avoid burning them.
Moisture Control
Keeping the soil consistently moist, but not waterlogged, is important. The germination medium should feel like a wrung-out sponge. Overwatering can lead to fungal diseases, which is something we want to avoid. Underwatering will dry out the delicate seeds and emerging sprouts. I find that using a spray bottle to mist the surface daily, or whenever it starts to look dry, works well. Covering your containers with a clear plastic lid or plastic wrap can also help maintain consistent moisture by creating a mini-greenhouse effect. Just be sure to open it for a bit each day to allow for air circulation and prevent mold.
Air Circulation
Even though we want to keep the soil moist, stagnant air can be a problem. Good airflow helps prevent fungal issues like damping-off, which can wipe out young seedlings quickly. If you’re using a plastic cover, lifting it for an hour or so each day is a good practice. If you’re using a heat mat, the slight warmth can sometimes dry out the surface faster, so keep an eye on that moisture level. A small, gentle fan set on low, directed away from the seedlings but towards the general area, can also improve air movement without drying them out too much. It’s all about finding that balance between warmth, moisture, and fresh air, much like creating a good environment for magnolia trees in general.
Caring for Young Seedlings
Watering Your Seedlings
Keeping the soil consistently moist is important for young magnolia seedlings. I’ve found that watering them about once or twice a week is usually about right, but you have to check the soil first. You want it to feel damp, not soggy. If you can stick your finger in about an inch and it feels dry, it’s time to water. Overwatering can lead to root rot, which is a big problem for any young plant. For other types of magnolias, good drainage is key, but Southern Magnolias can handle a bit more moisture. I use a simple moisture meter sometimes, which takes the guesswork out of it.
Light Requirements
When it comes to light, my seedlings do best with bright, indirect sunlight. Direct, hot sun, especially in the afternoon, can scorch their delicate leaves. If you’re starting them indoors, a sunny windowsill that doesn’t get harsh midday sun is perfect. As they get a bit bigger, I gradually introduce them to more light, but I’m always careful. If you’re growing them outside, a spot with morning sun and afternoon shade is often ideal, particularly in warmer climates. Too much direct sun too soon can set them back.
Fertilization
I don’t fertilize my seedlings right away. It’s best to wait until they’ve established a bit, usually after the first growing season, when I see some new growth. When I do start, I use a balanced, slow-release fertilizer, something like a 10-10-10 or 8-8-8. I usually apply it in early spring, then again in late spring and mid-summer. I’m careful not to overdo it, as too much can harm the plant. A little goes a long way, and it’s better to feed them a bit less than too much. I’ve read that some people use stake-type fertilizers, but I stick with granular or a diluted liquid feed. It’s also a good idea to test your soil pH; magnolias generally prefer slightly acidic soil. If your soil is too alkaline, you might need to amend it. For young trees, I’ve seen recommendations to apply fertilizer around the drip line, but for seedlings in pots, I just lightly mix it into the top layer of soil or use a diluted liquid feed. Remember, healthy soil is the best foundation for your plants, and you can find good soil amendments at your local garden supply store.
Transplanting Seedlings
Once my little magnolia seedlings have developed a few sets of true leaves and are sturdy enough to handle, I start thinking about moving them out of their cozy indoor environment. This is a big step for them, and I want to make sure it goes as smoothly as possible. The key is to gradually acclimate them to the outdoors, a process often called ‘hardening off’. I usually start this process in the spring, once the danger of frost has completely passed in my area.
The Hardening Off Process
This is probably the most important part of transplanting. You can’t just yank them from a protected spot and throw them into the full sun and wind. I begin by placing the seedlings in a sheltered location outdoors, like under a porch or a large tree, for a few hours each day. I do this for about a week. Then, I gradually increase the amount of time they spend outside and expose them to more direct sunlight and gentle breezes. If the weather turns harsh, I bring them back inside. It’s a slow transition, but it helps them build resilience.
Choosing the Right Time and Location
I aim to transplant my seedlings into larger pots or directly into their final garden spot in late spring or early summer. This gives them the whole growing season to establish themselves. When picking a spot in the garden, I look for a place that gets plenty of sunlight, but maybe with some afternoon shade when they are very young. Good drainage is also a must. If I’m moving them to larger pots, I make sure the new containers are only one size up from their current ones, and I always use a good-quality potting mix. It’s important to remember to repot your Southern Magnolia every few years to give the roots room to grow.
The Transplanting Steps
When it’s time to move them, I water the seedlings thoroughly a day beforehand. This helps the soil stay together around the roots. Then, I gently remove the seedling from its current container, trying not to disturb the root ball too much. If the roots are tightly wound, I might gently tease them apart a bit. I place the seedling in its new home, ensuring the top of the root ball is level with the surrounding soil. I fill in around it with soil, firming it gently to remove air pockets, and then water it in well. A light layer of mulch around the base, keeping it away from the stem, is always a good idea to help retain moisture.
It’s always a bit nerve-wracking to see them in their new, bigger spaces, but watching them take off and grow stronger is incredibly rewarding. Patience is the name of the game with these beautiful trees.
I keep a close eye on them for the first few weeks after transplanting, making sure they get consistent moisture and aren’t showing any signs of stress. If they look a bit droopy, I might provide a bit more shade for a day or two. It’s all about giving them the best possible start in their new environment.
Protecting Seedlings from Pests and Diseases
It’s a bummer when tiny magnolia seedlings get attacked by bugs or get sick. I’ve learned that keeping a close eye on them is the best defense. You’ll want to check the leaves and stems regularly for any signs of trouble. Early detection makes a difference.
Common Pests
Some common culprits you might see are aphids, which are tiny and often cluster on new growth, and scale insects, which look like small bumps on the stems and leaves. Caterpillars can also munch on the leaves. If you spot these, I usually try to remove them by hand first. For bigger infestations, a gentle insecticidal soap can work wonders. Just make sure to follow the product instructions carefully.
Fungal Issues
Fungal diseases can also be a problem. Look out for spots on the leaves, which might be a sign of leaf spot diseases. Sometimes, leaves can turn yellow or wilt even when the soil is moist. This could indicate a root issue or a fungal infection like Verticillium wilt, though that’s more common in older trees. Good air circulation and avoiding overwatering can help prevent these. If you see signs of disease, removing affected leaves promptly is a good first step. Sometimes, a fungicide might be necessary, but I try to use it as a last resort.
Prevention Strategies
- Good Airflow: Don’t crowd your seedlings too much. Proper spacing helps prevent fungal growth.
- Water Wisely: Water at the base of the plant, preferably in the morning, so the leaves have time to dry. Avoid letting the soil stay soggy.
- Cleanliness: Keep the area around your seedlings tidy. Remove any fallen leaves or debris where pests or diseases can hide.
- Healthy Plants: Strong, healthy plants are naturally more resistant. Make sure your seedlings are getting the right light and nutrients.
Keeping your young magnolias healthy means being observant. It’s about catching problems early and acting quickly, but also about creating an environment where they can thrive without getting sick in the first place. A little bit of preventative care goes a long way in protecting your investment.
Dealing with Weather Stress
Sometimes, what looks like a pest problem is damage from the weather. Young seedlings can be sensitive to extreme heat, cold, or strong winds. If you notice leaves browning or wilting, consider whether the conditions have been harsh. Protecting them from harsh sun or frost, especially when they are very young, is important. You can use shade cloth or move potted seedlings to a more sheltered spot. I’ve found that a light layer of mulch can help regulate soil temperature and moisture, protecting the roots from temperature swings. This is especially helpful during those transition seasons. For more on planting, you can check out these magnolia planting instructions.
Pruning and Shaping Young Magnolia Trees

When I first started growing Southern Magnolias from seed, I was a bit hesitant about pruning. I worried I might do more harm than good. However, I’ve learned that a little bit of shaping can help these young trees develop a strong structure. It’s not about drastic cuts, but more about guiding their growth.
Why Prune Young Magnolias?
- Encourage Strong Structure: Pruning helps direct the energy of the young tree into developing a sturdy trunk and well-spaced branches. This prevents weak crotches that could break later.
- Remove Unwanted Growth: You might get multiple leaders or branches growing inward. Pruning these early on sets the tree up for a better shape.
- Improve Air Circulation: Removing crowded branches can help air move through the tree, which can reduce the risk of fungal issues.
When to Prune
The best time to do any significant pruning is in late winter or early spring, just before the new growth starts. This timing allows me to see the tree’s structure clearly without leaves and gives it time to heal before the heat of summer. I avoid pruning right after flowering, as that can remove potential flower buds for the next year.
How to Prune
When I approach a young magnolia seedling, I look for a few key things:
- Crossing Branches: If two branches are rubbing against each other, I remove the weaker or poorly positioned one. It’s important to make clean cuts just outside the branch collar.
- Inward-Growing Branches: Branches that are growing back towards the center of the tree are usually removed to open up the canopy.
- Multiple Leaders: If a tree is trying to grow two main trunks, I select the strongest one and prune the other back to a side branch. This encourages a single, dominant leader.
- Dead or Damaged Wood: I always remove any branches that are dead, broken, or show signs of disease. I make sure to sanitize my pruning tools between cuts if I suspect disease, often using rubbing alcohol. This is a good practice for maintaining tree health.
I try not to remove more than a quarter of the tree’s canopy in any single year. It’s better to make small, frequent adjustments than one large, stressful pruning. For shaping, I’m just looking to create a balanced form. It’s a gradual process, and I find that patience is key.
Anticipating Growth
Growing a Southern Magnolia from seed is a long game, and I’ve learned that patience is the name of the game here. It’s not like planting a marigold that pops up in weeks. With magnolias, you’re planting a tree that could live for a century, so its timeline is naturally much longer.
Germination to Sapling Stage
After you’ve planted your seeds and they’ve finally sprouted, you’ll have tiny seedlings. These little guys are delicate. For the first year, they’ll focus on root development more than anything else. You might see slow top growth, maybe only a few inches. It’s important to keep them protected and provide consistent moisture. By the end of the first year, if all goes well, your seedling might be anywhere from 4 to 12 inches tall. It depends on the conditions you provide and the specific seed.
Young Tree Development
In the second and third years, you’ll start to see more noticeable growth. The seedling will begin to develop a more woody stem and a branching structure. Growth can still be a bit slow, maybe 6 to 18 inches per year, but it’s steady. This is when you’ll want to start thinking about transplanting them to a larger container or their final spot in the ground, if you haven’t already. Proper spacing is key here, as these trees can get quite large, with some varieties reaching 60-80 feet tall and 30-40 feet wide.
Maturing and First Blooms
This is where the real waiting begins. It typically takes anywhere from 5 to 10 years, sometimes even longer, for a Southern Magnolia grown from seed to produce its first flowers. This timeframe can vary quite a bit. Factors like genetics, soil quality, sunlight exposure, and overall care all play a role. I’ve heard of some taking as little as 5 years, while others might not show a bloom until they’re 12 or 15. It’s a significant commitment, but seeing that first, iconic magnolia bloom makes all the waiting worthwhile.
Here’s a general idea of what to expect:
- Year 1-3: Focus on establishing roots and a basic structure. Expect slow to moderate growth.
- Year 4-7: The tree will gain height and width, developing a more tree-like form. You might start seeing thicker branches.
- Year 8-15+: The tree reaches maturity and begins to flower. The size and flowering frequency will increase with age.
Remember, these are just estimates. Nature has its schedule, and your magnolia will follow it. The journey is as important as the destination, and watching your tree grow year after year is a reward in itself. Don’t get discouraged by the slow pace; it’s part of what makes these trees so special.
Once your tree is mature and blooming regularly, you can expect it to live for 80 to 100 years or more. It’s a legacy planting. If you’re interested in learning more about the planting process, checking out resources on how to plant magnolia trees can be helpful.
Embracing the Journey of Growing Magnolias from Seed
Well, we’ve made it to the end of this guide. It’s been quite the process, hasn’t it? From picking out those promising seeds to watching the first tiny leaves unfurl, growing a Southern Magnolia from seed is a real commitment. It’s not like buying a small tree from a nursery; this is a slower, more deliberate path, and honestly, I find that incredibly rewarding. It’s a chance to connect with nature on a different level, to understand the life cycle of these magnificent trees.
The Long Game: Patience and Observation
Growing from seed means you’re in for the long haul. Don’t expect a towering tree overnight. It takes time, and that’s part of the charm. You’ll learn to appreciate the subtle changes, the slow growth, and the resilience of these plants.
- Observe your seedlings daily: Look for any signs of stress, pests, or disease. Early detection is key.
- Adjust care as needed: As they grow, their needs for light, water, and nutrients will change.
- Celebrate small victories: That first true leaf, the thickening of the stem, the development of a new bud – these are all milestones worth acknowledging.
Anticipating Future Growth
While it might seem like ages away, it’s good to have a general idea of what to expect. A Southern Magnolia can live for 80 to 100 years, so you’re planting something that could outlast you.
| Variety | Mature Height (ft) | Mature Width (ft) |
| Bracken’s Brown Beauty | 30-40 | 30-40 |
| D.D. Blanchard | 50 | 50 |
| Little Gem | 20-25 | 20-25 |
The Reward of a Native Tree
There’s a special satisfaction in nurturing a plant that’s native to your region. These trees are built to thrive in local conditions, meaning less fuss for you and more support for local wildlife. They are a natural fit for your yard, requiring less supplemental watering and fertilizer once they’re established. Planting a native tree like the Southern Magnolia is a way to contribute to the local ecosystem, providing food and shelter for birds and pollinators. It’s a choice that benefits both your garden and the environment around it.
Growing a Southern Magnolia from seed is more than just gardening; it’s an investment in a living legacy. It’s about patience, observation, and a deep appreciation for the natural world. The journey itself is as beautiful as the eventual bloom.
Starting magnolias from seeds can be a fun project. It takes patience, but seeing your tree grow is rewarding. Want to learn more about planting and caring for your new magnolia? Visit our website for helpful tips and guides!
Frequently Asked Questions
Why are native Southern Magnolias considered easier to care for?
I can explain that. Southern Magnolias are native trees, meaning they’ve grown naturally in their home areas for a very long time. This makes them well-suited to the local weather and soil. Because of this, they generally need less watering and care once they’re established, unlike some other garden plants that might need constant attention.
What happens if my Southern Magnolia experiences a cold snap?
That’s a great question! Southern Magnolias are quite resilient. While young seedlings might be a bit sensitive to frost, established trees can handle occasional cold spells. If they do experience a freeze, you might see some leaves get damaged or fall off, but new leaves will grow back in the spring.
What challenges should I be aware of with Southern Magnolias?
I’ve noticed that too! Southern Magnolias do drop their leaves, and their dense canopy can create a lot of shade underneath. If you’re planning to have grass right up to the trunk, it might be better to rethink that. A shady garden with native plants would likely do much better there and would also benefit from the fallen leaves turning into soil.
Are Southern Magnolias very large trees?
Yes, they certainly can! Southern Magnolias are large trees, often growing between 60 to 100 feet tall and spreading up to 50 feet wide. It’s important to give them plenty of space when you plant them so they have room to grow over many years.
Where is the best place to plant a Southern Magnolia?
I find that they prefer to be near water. In nature, you’ll often find them growing close to lakes, rivers, or swamps. If you don’t have a water source nearby, just make sure to plant yours in a spot that stays consistently moist, perhaps where water tends to collect after it rains.
Is it better to plant a native Southern Magnolia or a cultivar?
While there are many beautiful Southern Magnolia varieties, or cultivars, available, I generally lean towards planting the native species. Native plants are perfectly adapted to their environment and provide the best support for local wildlife, like birds and butterflies.
When is the ideal time to plant a Southern Magnolia?
I’ve learned that the best times to plant are usually in the autumn or late spring. During these times, the soil is typically moist, and there’s less risk of frost, which helps the young trees get established more easily.
What are the advantages of planting a native Southern Magnolia?
I’ve found that Southern Magnolias are quite beneficial! As native trees, they provide important food and shelter for local wildlife, such as songbirds and butterflies. Plus, once they’re settled in, they require less watering and care compared to many other landscape plants, making them a low-maintenance choice that can bring beauty for generations.
Request a Quote
Our Services